Disability Ministry Supplies: Switch-Adapted Toys
This month has been so much fun diving into practical supplies and tools that we can use in disability ministry! In case you missed our emails this month, we've talked about laminators/lamination sheets, Velcro and adhesives, and adaptive art supplies.
Today we're talking about switch-adapted toys!
WHAT ARE SWITCHES?
Switches are a type of assistive technology. In the simplest terms, they turn something on and off (think of a light switch). They help individuals with fine motor difficulties and disabilities access toys, games, computers, iPads, appliances, and more.
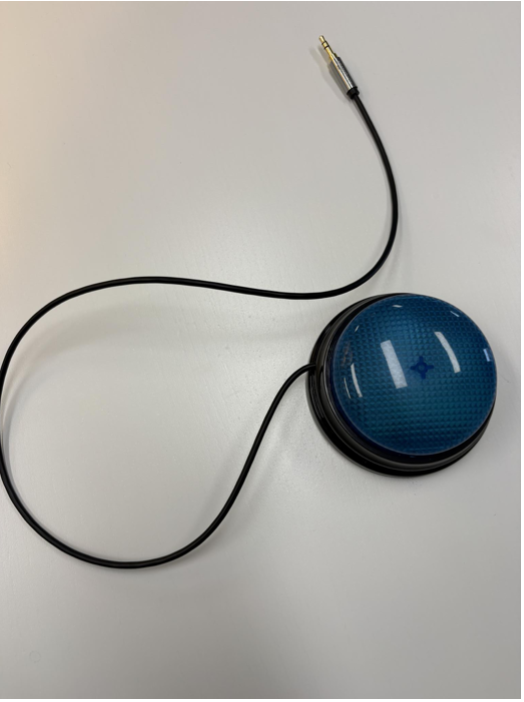
You may not have ever dipped your toes into the world of assistive technology, but there are so many possibilities for our students to better access their environments when they have the opportunity to use these tools. I can't wait to introduce you to these fun tools!
Psst…If you have used recordable buttons before in your ministry, those are actually considered a type of switch! So congrats, you're already using assistive technology.
Note: Assistive technology devices can be expensive. We totally understand that for some churches, purchasing supplies like this is not feasible. But stick with us and let us show you what is possible!
How to Switch Adapt a Toy
Let's go step by step through how to switch adapt a toy to make it more accessible to students in your ministry (or your child at home).
All of the supplies will be linked at the end for you.
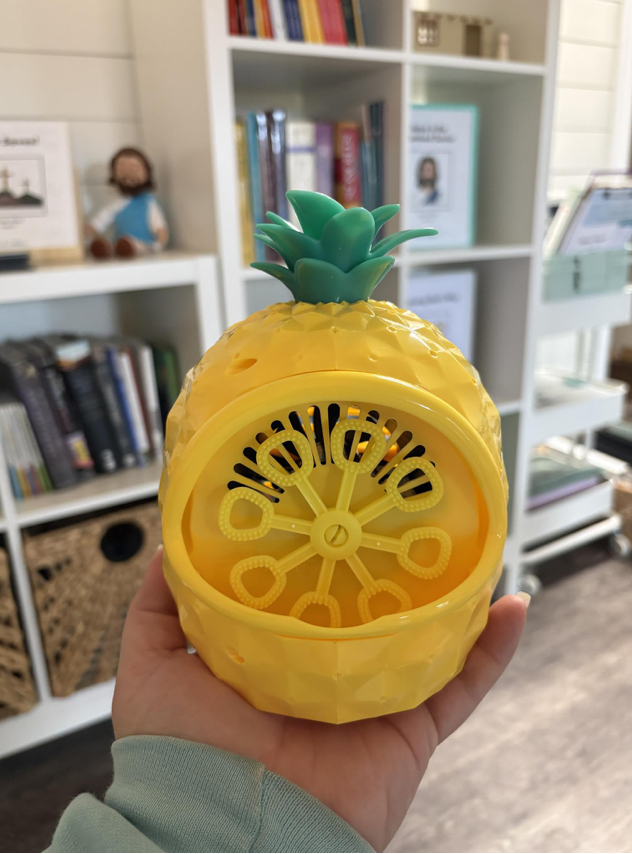
STEP 1: CHOOSE A TOY
To switch adapt in the way that I am going to show you, you need a toy that has a simple on-and-off switch. You don't want a ton of different buttons or features on the toy. I'd recommend looking through toys you already have or looking at local thrift stores.
STEP 2: REMOVE ONE BATTERY
It doesn't matter which battery; just remove one.
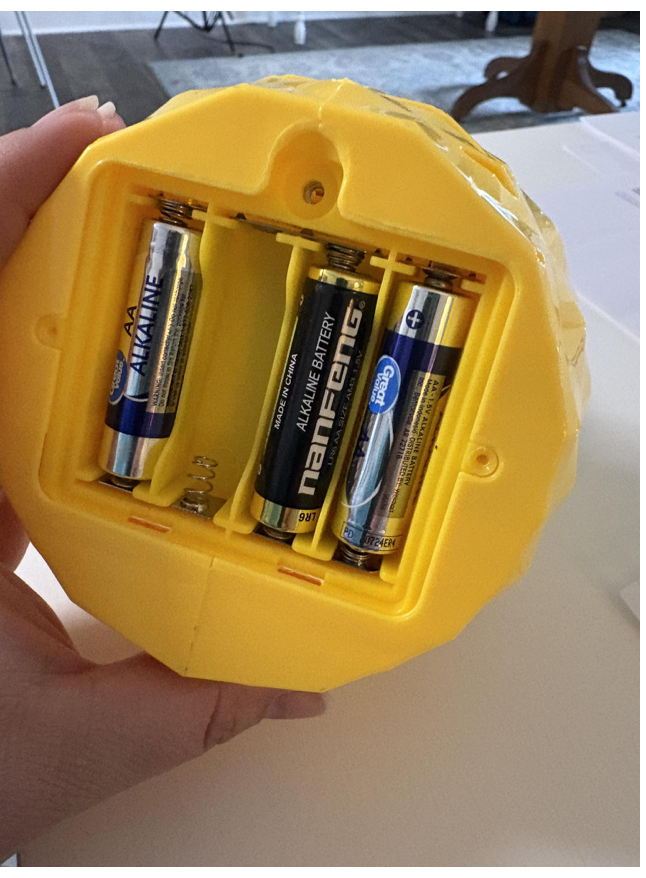
STEP 2: USE A BATTERY INTERRUPTER
A battery interrupter interrupts the electrical circuit between the battery and the toy and will redirect the circuit through the switch.
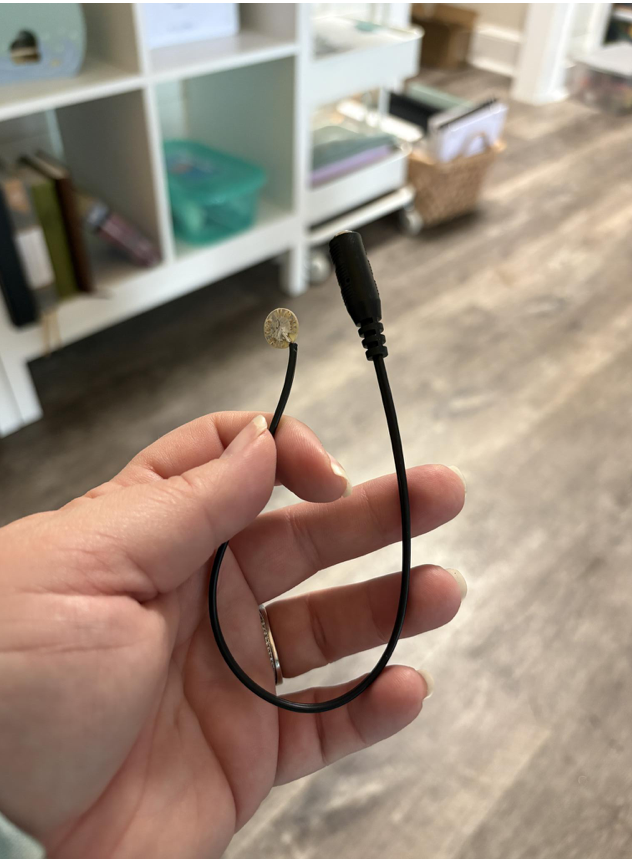
Place the battery interrupter on the open positive terminal where you removed the battery. Then put the battery back in. This can be a little tricky, as the battery interrupter can easily slip out when you're trying to put the battery back in, but give it a few tries, and it should pop in. If the battery interrupter has trouble touching the positive terminal because of the way the toy is made, a piece of aluminum foil can be used to complete the circuit by touching the battery interrupter and the terminal. Just make sure the foil never touches both the positive and negative sides of the battery.
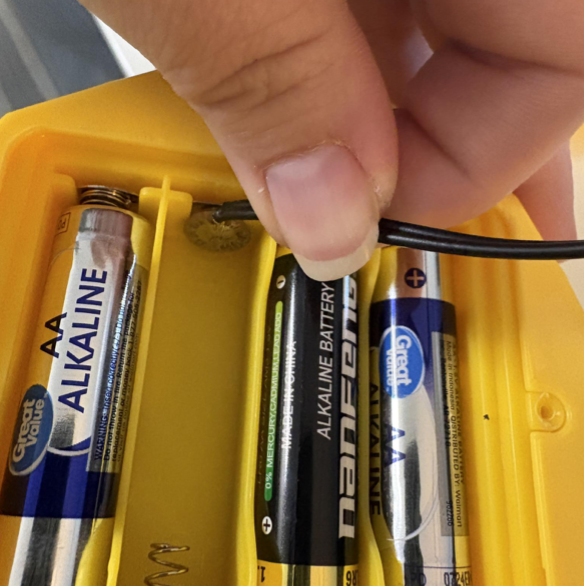
You may not be able to put the cover back on the battery compartment with the battery interrupter inside. If you want to keep using this toy long-term with the switch, I'd recommend cutting a small divot on the edge of the battery cover so the cord can come out and the batteries stay safely inside. Otherwise, always use with adult supervision.
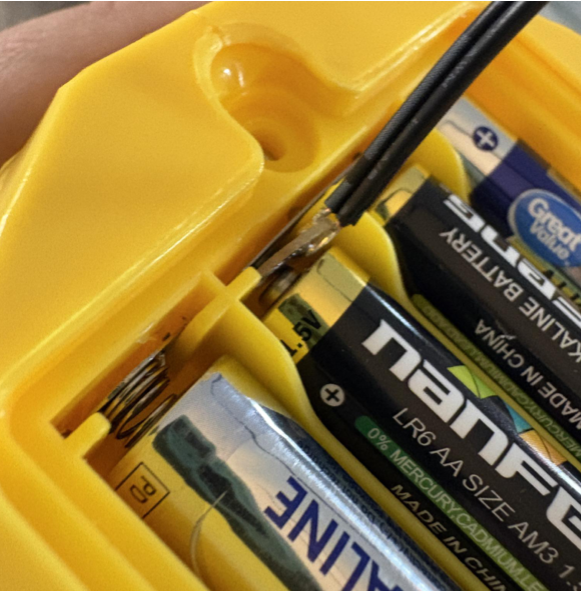
You can actually hardwire toys to be switch-adapted, but I like being able to use a battery interrupter with different toys.
STEP 3: PLUG THE BATTERY INTERRUPTER INTO A SWITCH
Now you're going to plug an adaptive switch into the battery interrupter. Make sure the toy is set to the regular ON position on the toy itself, and then test to see if the switch will now cause the toy to turn on and off. If not, you may need to adjust the battery interrupter a bit.
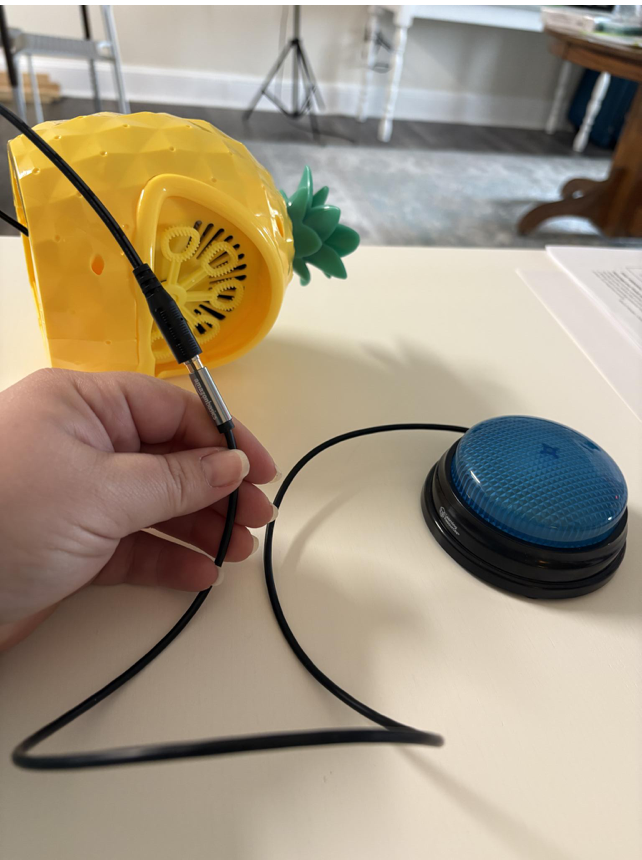
STEP 3: TIME TO PLAY!
Once you have the switch attached, it's time to play! Students can play with the toy by touching the switch.
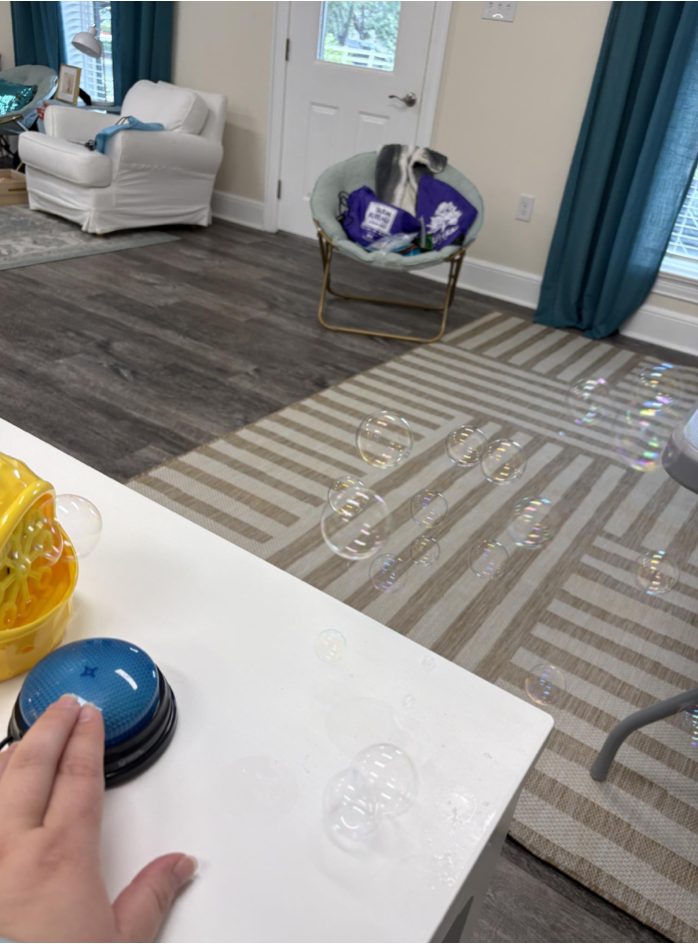
It's so fun to see students experience turning a toy on and off - something that we often take for granted but is actually something many of our students cannot do on their own.
If video steps would be helpful for you, I recommend the video below from Youtube. It helped refresh my memory on how exactly to set up a switch adapted toy and you can see how much fun this little girl has with her switch adapted toy!
LINKS
TOY:
SWITCHES:
Switch I purchased from Amazon
BATTERY INTERRUPTERS:
LEARN MORE
This post is just a super quick introduction to switch adapted toys and switches in general. There's so much more you can do!
Here are a few places to learn more:
Switch Adapted Toys Presentation slides - from TECHOWLPA.ORG
Using Switches in Special Ed (can apply some of the same principles to church!)- Simply Special Ed
Learn more about hard-wiring switch-adapted toys, 3D-printed switches, and recommended toys!